🚧 NOTE: No-code web experiments are currently considered in
beta. To access them, enable the feature preview in your PostHog account. You'll also need to definedisable_web_experiments: falsein your Posthog web snippet configuration. We are keen to gather as much feedback as possible so if you try this out please let us know. You can email daniel.b@posthog.com, send feedback via the in-app support panel, or use one of our other support options.
No-code web experiments enable you to run A/B tests, multivariate tests, and other experiments that modify your website without writing a single line of code.
Build your web experiment with the PostHog toolbar, our no-code tool, and then use the preview variant button to verify that everything works as expected.
How to set up a no code experiment
In this example, we will the font size of a button on a sample webpage without writing any code.
Set up your experiment in PostHog
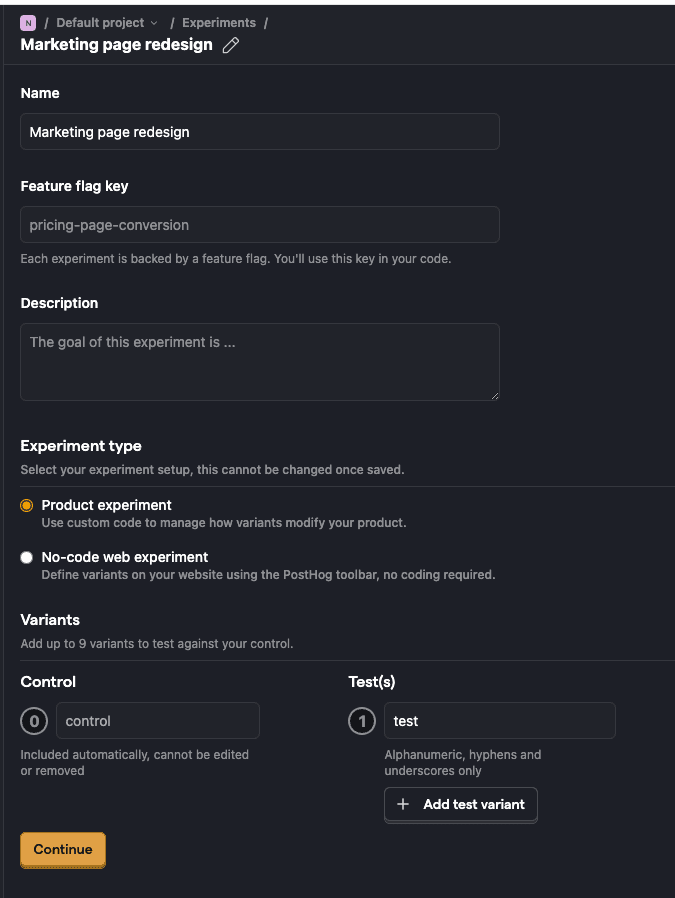
Go to the experiments tab in PostHog and click New experiment. On the new experiment page, fill out your experiment detail and select your experiment type.
The experiment type setting enables you to choose how your experiment is implemented. Note that once the experiment type is selected and saved, it cannot be changed.

Experiment types
Product experiment
- Choose this option if you intend to use custom code to manage how variants modify your product.
- Recommended for experiments that require specific, code-based adjustments and configurations.
No-code web experiment
- Choose this option to define variants on your website without writing code.
- This setup leverages the PostHog toolbar, allowing you to make adjustments entirely within your browser.
We will select the no-code web experiment option for our example project.
Implement the experiment on your website
Once you've created the no-code web experiment, you are brought to the Implementation section of your experiment on PostHog.
This is where you can define variant changes directly on your website using the PostHog toolbar. The toolbar enables you to select elements and apply transformations for each variant in your experiment. To use it:
- Click the Launch toolbar on your website button.

Click the vial tab on the toolbar and use it to select the elements you want to modify for each variant.
Apply the desired transformations to implement the changes.
The toolbar will guide you through the process of setting up the variant changes visually on your site, making it easier to customize without coding.

How to edit an experiment variant
Experiment variants enable you to implement and test changes to specific elements on your webpage. For example, you can test different call-to-action (CTA) button sizes and evaluate their effectiveness compared to the baseline (control group).
1. View and edit variants
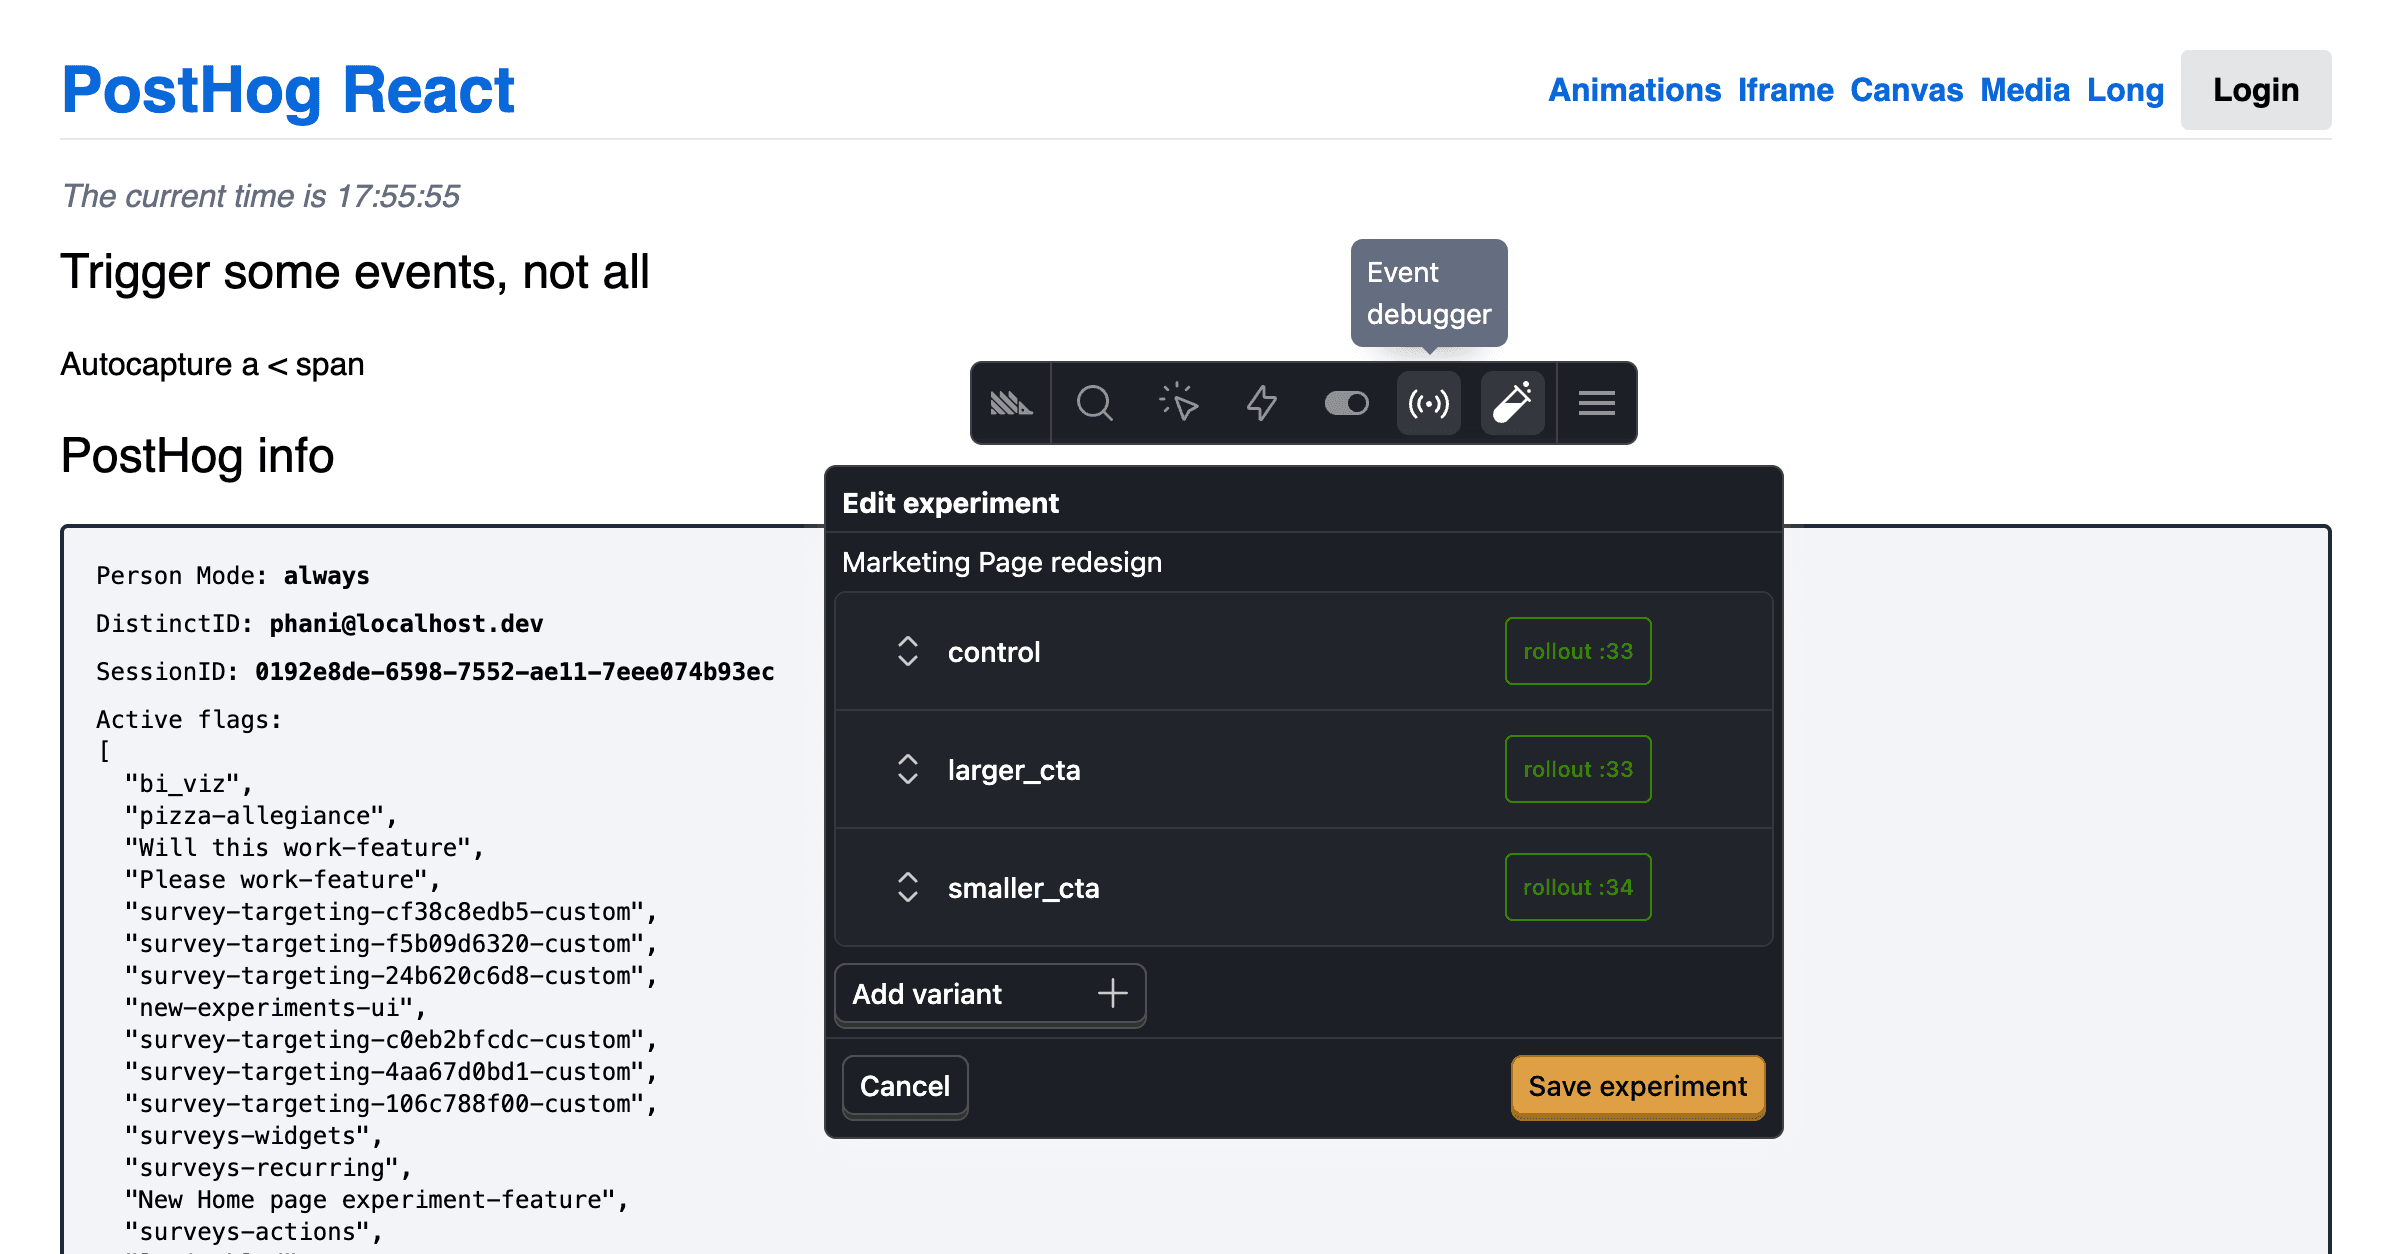
On the experiment detail page, each variant is listed with its rollout percentage. For example:
- control:
rollout: 33% - larger_cta:
rollout: 33% - smaller_cta:
rollout: 34%
You can click on a variant to view or edit it:
- Review the variant name (e.g.,
larger_cta). - If no modifications are defined yet, a message such as "This experiment variant doesn't modify any elements" will appear.
- Use the options to add or remove elements.
2. Add or modify elements
To make changes to a variant:
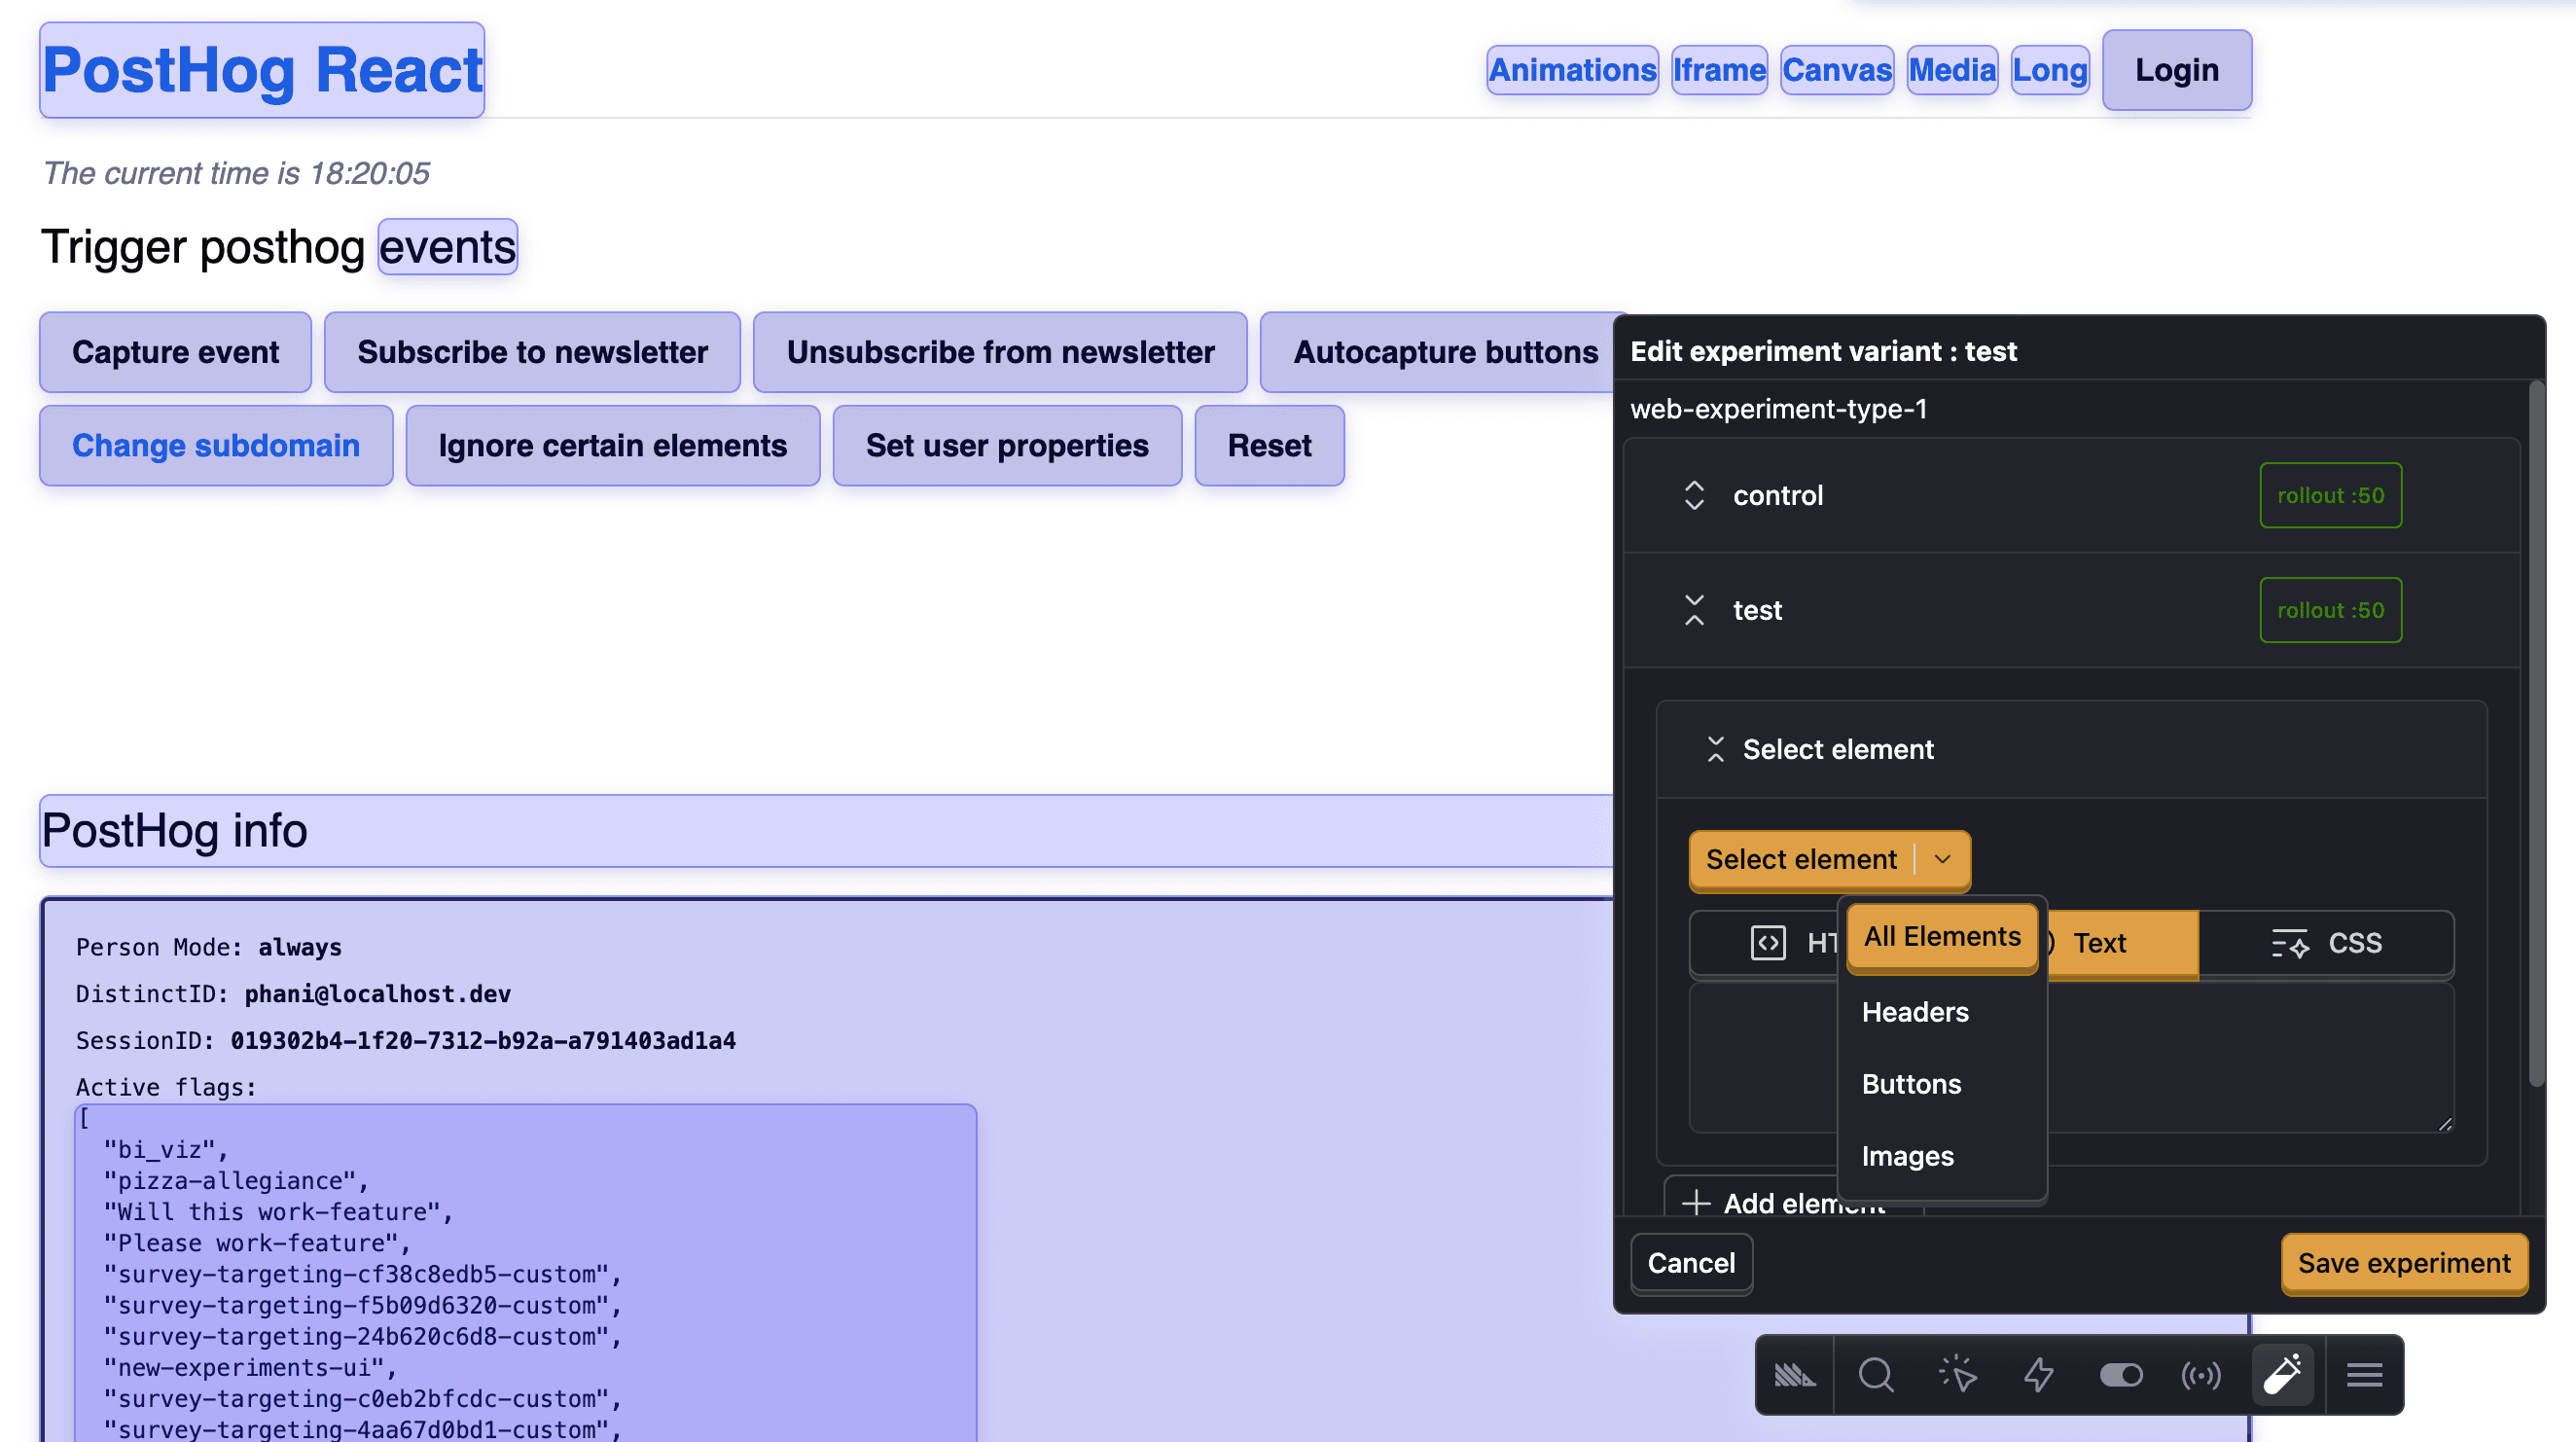
- Click Add element to include specific webpage elements (e.g., buttons, headers, images) that you want to modify.
- Define the modifications (e.g., increase button size, change text color).
3. Add new variants
To create a new variant:
- Click the Add variant button at the bottom of the editor.
- Enter a name for the new variant.
- Add and configure elements for the new variant.
4. Save changes
Once all modifications are complete:
- Click the Save experiment button to apply the changes.
5. Cancel edits (optional)
To discard any changes and return to the previous view, click Cancel.
How to modify elements in an experiment variant

Open the experiment editor in the toolbar and select the variant you want to modify (e.g., test).
Next, click the Select element dropdown in the variant editor. This provides options like:
After selecting an element, define the specific changes for the selected element:
Any selected element in your experiment's variant can have multiple modifications applied to it.
To modify additional elements, click Add element and repeat the selection process.
Finally, once all desired modifications are applied, click Save experiment to finalize the updates.
How to preview a variant
Previewing variants allows you to verify their configuration and ensure that the changes are displayed and functioning as expected before the experiment goes live.
To do so, first, locate the variant you want to preview in the distribution section of the experiment editor (e.g., control, larger_cta, or smaller_cta).
Once you find it, click the Preview variant button next to the desired variant. This opens a live preview of the variant’s user interface, enabling you to see the applied changes in action.
Final touches
Congratulations! You're now ready to launch a web experiment.
Before launching, ensure the following:
- Test thoroughly: Verify that all variants display and function as expected across devices and browsers. See our testing feature flags doc for more details.
- Document changes: Record the modifications made to each variant and their goals.
Also, during the beta period, you'll need to add disable_web_experiments: false to your PostHog web snippet configuration, e.g.: